
ACRONYMS
Many players and Veterans have short versions of specific terms in Resident Evil: Outbreak that have been used since the days of retail to now. Listed below are commonly used acronyms within the game and their meanings.
HP: Hit Points or Vitality Points
GG: Good Game
G+G: Green + Green Herb mixture
G+G+B: Green + Green + Blue Herb mixture
G+R: Green + Red Herb mixture
G+B+R: Green + Red + Blue Herb mixture
B+R / R+B: Red + Blue Herb mixture
FAS: First Aid Spray
AV: Anti-Virus Pill
HG: Handgun
HG SG: Handgun SG
SG: Shotgun
SMG: Submachine Gun
AR: Assault Rifle
MAG: Magnum
GL: Grenade Launcher
RL: Rocket Launcher
OB: Outbreak
BFP: Below Freezing Point
TH: The Hive
HF: Hellfire
DD: Decisions, Decisions
IK: Instant Kill(ed)
VG: Virus Gauge
ZS: Zombie Screen (Infamous screen when you randomly disconnect from a game online)
DC: Disconnect(ed)
RM: Room Master
NL: Normal Lag
UL: Ultra Lag
UL+: Ultra Lag+
NDC: No Damage Clear bonus
NWC: No Weapon Clear bonus
PK (er/ing): Player Killer (A player during online play that focuses on killing a specific player)
TK (er/ing): Team Killer (A player during online play that focuses on trying to kill the entire team or make scenario progression difficult or impossible. Many will use cheats to ensure their success)
RQ: Rage Quit
MENUS
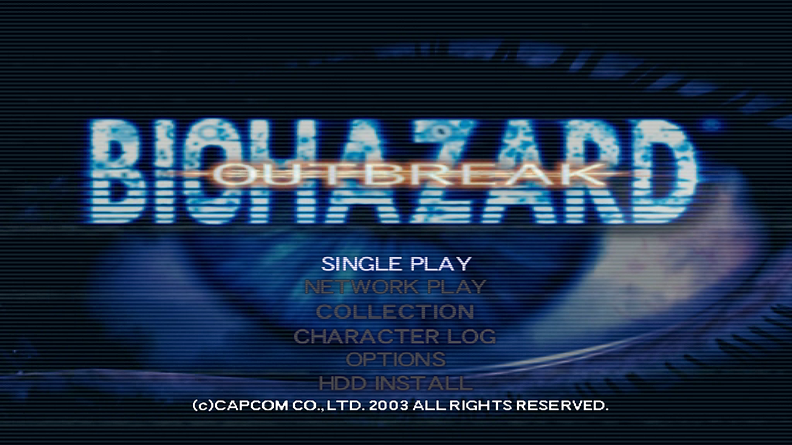
After the game reading the Playstation 2 Memory Card and a few preview screens, you’ll be brought to the title screen where pressing the Start button will display a menu with options to choose from. Two of which will take you straight into the game: either offline through Single Play Mode or online through Network Play Mode. If you have the official HDD (Hard Disc Drive) installed on your Playstation 2, a new option will appear allowing you to install the game into the HDD which will reduce loading times through cutscenes and room transitions. This also allows you to play with other players who are also using HDD. With Emulators being more commonly used and having loading that is comparable and even faster than HDD due to OPL loading, most players that play online currently rarely use console or HDD.
SINGLE PLAY
The Single Play Mode allows you to play offline either solo or with 2 AIPC (Artificial Intelligence Partner Characters) partners. Single Play Mode has no immediate prerequisites, so players can immediately play offline. As you complete more scenarios or on various difficulties, harder difficulties become available for purchase in COLLECTION as well as Lone Wolf Mode which allows a player to play without AIPC partners. Lastly, the Infinity Mode can unlock and be available when certain conditions are met.
When you select Single Play Mode, you can decide to select Scenario which allows you to play the game like normal and Infinity where any scenario you play, you’ll have the following: infinite ammo in all firearms, melee weapons will have infinite structural points and cannot bend or break, and throw weapons will not leave your inventory when used. Infinity Mode is only available to Single Play Mode exclusively. Single Play Mode is the main mode to learn the scenarios, characters, and enemy behaviors before taking your knowledge online. Special Item hunting is suggested to be done in Single Play Mode.
NETWORK PLAY
Network Play Mode allows you to take your skills online and play with others online via broadband services. The official Resident: Evil Outbreak online servers were closed down for Resident Evil Outbreak File #2 on March 31, 2007 and Resident Evil Outbreak: lost the official online compatibility on January 2, 2008 for North America. The official online support through the Japan versions (ran through KDDI) lost online compatibility on June 30, 2011. In 2014, The_Fog was able to bring back online compatibility for the Japanese versions of both titles via Fan Servers which to this day still run currently.
The requirements of playing online are save data of your game and having your network configurations saved onto your memory card. If you’re returning to Network Play Mode, these settings will save into the Memory Card allowing for easier access online. If it is your first time playing online, you’ll need to configure your settings before you can play online. Refer to http://obsrv.org/index.php on how to play the game online via Playstation 2 or Emulator.
COLLECTION
Here players can use Result Points earned from either Single Play Mode or Network Play Mode to purchase various items such as images, BGMs, costumes, and even extra modes for the game. The bottom will display how many Result Points you have to use. It is suggested you save your Result Points for the extra modes before dabbing into the images and BGMs. Costumes and NPCs are unlocked by finding specific Special Items or clearing a scenario under specific prerequisites and are the more expensive items for purchase. Completing scenarios and doing more events as well as finding more Special Items and ensuring your AIPC partners survive will ensure more Result Points are rewarded. In Network Play Mode, Result Points are more tied on clearing the scenario as fast as possible.
CHARACTER LOG
The Character Log shows your overall statistics for both Single Play Mode and Network Play Mode. This ranges from your overall play time, character percentage uses, items used, travel distance, bonuses, etc. This is primarily used as a resource to track your performance progress. Many features unlocked from Single Play Mode carry over to Network Play mode such as Scenario completion events and Special Item unlocked.
HDD INSTALL
Only appears if you have an HDD installed on your Playstation 2. Before installing, a message will appear asking you if you wish to install the game onto the HDD (will require 1024 mb to install). If you decide not to install, you’ll be reverted back to the main menu. Selecting yes will take you to another screen where the game will start to install itself onto the HDD (a picture puzzle will appear allowing you to solve it as the download is in progress). This’ll take several minutes to install successfully.
Once finished, you’ll have the ability to switch from DVD-ROM to HDD and vice versa to play the game both in Single Play Mode and Network Play Mode. HDD reduces loading times in both door transitions and cutscenes so this is more ideal when playing offline. If playing on Emulator, this is not recommended as playing the game via CDVD (Fast) or OPL HDD loading will load just as fast and even quicker than HDD.
OPTIONS
Here you can adjust or change the in-game settings as you see fit. Any changes made in Options has the game ask if you wish to save these settings. However, if you enable auto-saving, the game will immediately save any changes without a prompt.


CONTROLLER SETTINGS
Allows you change the controls that will better suit your needs. When starting a new save file, the game will have the controls set to Type-A by default. You can switch the controls types from A to F. Type-C is one of the most common used controls for most players as this one is more oriented to the controls from the previous Resident Evil titles.

SOUND SETTINGS
You can adjust the sound by switching between Stereo or Monaural. You can adjust the volume for the in game BGMs and sound effects as well. BGMs are only impacted when you adjust the BGM level (including play BGMs from COLLECTIONS), and SE Volume effects the in-game sounds and audio Ad-Libs from the characters.

BRIGHTNESS ADJUST
Allows you to adjust the in-game brightness to either make it darker or brighter. Adjust as you see fit but also take in account your TV or monitor’s brightness and contrast as well as you’ll need to balance both to get the perfect brightness level suited for play.

SCREEN ADJUST
Allows you to adjust the screen so the game’s camera will veer more in the direction you have the X and Y axis set on. This won’t affect spots in rooms and areas where the camera angle will naturally shift in game.

SAVE/LOAD
Allows you to save any progress or changes made in the game or settings that have not been saved already. Or you can load your previous save but any changes to the game or settings that were not saved prior will be lost and will go back to the previous settings from the last save. If you want have the game save every time a change to the game has been made, you can enable the auto-save option. Careful with this, as enabling auto-saving will even save games you die or quit and will lower your overall survival rate.
STARTING A GAME

SCENARIO SELECTION
Once you select from either Scenario or Infinity from the Single Play option, you’ll have the ability to select one from five possible scenarios to play (on a new save file, you’ll only have access to the Outbreak scenario and will unlock the next scenario upon beating this scenario once). It is highly recommended to play offline first and unlock the scenarios than immediately jumping online to play as you’ll be unable to unlock the other scenarios online and will have to rely on other players to host sessions of the other scenarios to play them. From the Scenario select menu you can view the scenario’s event completion status to see which events have already been completed.
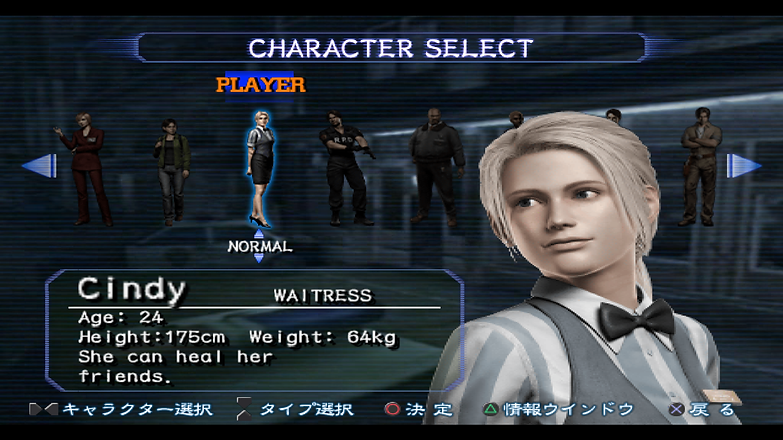
CHARACTER SELECTION
Once you select the scenario you wish to play, you’ll be taken to another screen to where you must select your character. You can select one of eight possible characters. Each character has a different background and each has their own strengths and special abilities. Pick a character that will best suit your needs. If you’ve purchased NPCs, you’ll be able to select the ones purchased from COLLECTION. Refer to the CHARACTER category for more detailed information on the characters and the attributes on the NPCs.

PARTNER MODE
Only appears if you’ve bought the Lone Wolf Mode extra from COLLECTIONS. After you’ve chosen your character, you’ll be asked whether to play with AIPC partners or play alone. Selecting default will give you two AIPC Partners once you begin the scenario. Selecting Lone Wolf Mode will start the scenario with just you and you’ll have no partners at all. Having no AIPC partners has it advantages as you won’t have to worry about them wasting resources, grabbing items intentionally set down for later, or possibly making the scenario harder to complete. However, enabling them does take the heat of enemies off of you sometimes, and helps reduce the time needed to complete certain scenarios.

DIFFICULTY
Before beginning the scenario, you’ll be prompted to select a difficulty to play on. In Network Play Mode, you’ll need to select the difficulty before creating a room, otherwise the default difficulty will be set to Normal. As the difficulty increases, enemies will have more vitality points and will hit harder and cause more viral contamination with their attacks. Ammo and recovery items will be less plentiful and, in some scenarios, key item locations will be different. When starting a new save file, in Single Play Mode, only the Easy and Normal difficulties will be available to the player but in Network Play Mode, players can access all difficulties even if they don’t have them unlocked.
To obtain the Hard and Very Hard difficulties for Single Play Mode, they must be purchased from COLLECTION after meeting the requirements.
CONTROLS

MOVEMENT
There are two methods of moving in Resident Evil: Outbreak. Tank controls through the use of the D-Pad (2D movement) and fluid movement through the use of the left analog Control Stick (3D movement). The tank controls were introduced in the past Resident Evil titles so many veterans will be familiar with this movement scheme. The D-Pad or tank controls as many refer to it is simple enough in how it functions; Pressing up causes the character to move forward, pressing left or right on the D-Pad causes the character to turn left or right, and pressing down on the D-Pad will cause the character to walk backward slowly. Depending on the control type used, when using the control stick for movement, you can alter the speed of movement of your character. Slightly tilting the stick in any direction will cause the character to walk while moving the stick will cause the character to run.
When you hit specific spots in a room or area in which the camera will shift to a new angle, if you continued to hold right for example on either the D-Pad or control stick, your character will still move right despite the camera shift. However, if you release the button or stick and press right on the D-Pad or move the stick right, your character will move in the direction that you pressed because the controls will reset upon a camera angle switch.
Running is generally better as it allows you to move quicker, complete tasks faster, but most importantly for spacing between you and the enemy. However, running can aggro enemies sooner than usual because of the louder sound. Walking is slower but can be useful in turtling, having your characters examine if a monster is hiding off screen (they’ll shift their head to look at the enemy if they’re in range), not aggro enemies quicker, and positioning when trying to fight. On steps and stairwells, characters can only move at a set speed, therefore the speed reduction movement can hurt characters as enemies are much more dangerous on stairwells.

QUICK TURNS
Introduced in Resident Evil 3: Nemesis, pressing the downward button on the D-Pad and pressing the Cancel button allows your character to perform a 360 degree turn which can allow you to run from enemies. Very useful for players that favor tank controls.

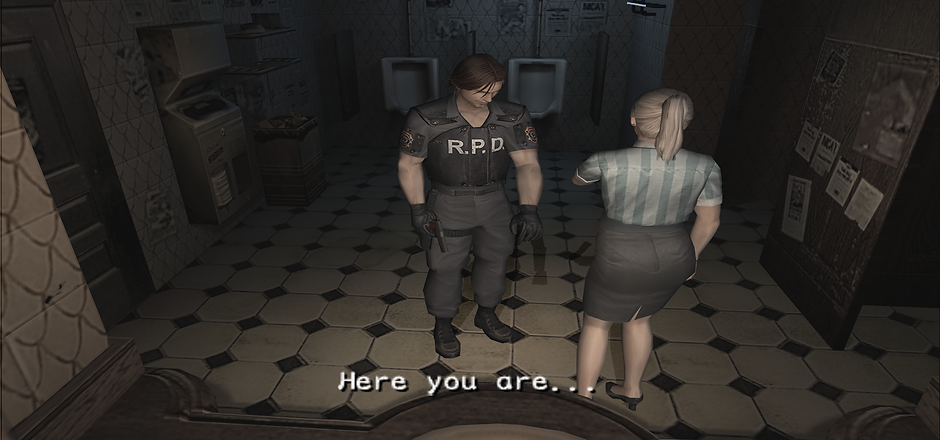
CUTSCENES
Cutscenes will appear before the scenario truly begins, during scenario play, and completing a scenario. Cutscenes can provide hints on what objectives need to be completed but overall enhance the game play. You can skip cutscenes by pressing the Start button. During online play, all players must press the Start button to skip cutscenes. If the cutscenes do not skip, it means at least one player has not pressed the Start button yet.

PUSHING OBJECTS
Certain objects in the environment can be pushed across the ground to either create barricades, reveal hidden passages, reveal hidden items, reveal crawling spaces, or for solving puzzles. To push an object, you must position your character correctly of the object you wish to push. If the object can be pushed, your character will hunch down and push the object slowly. While pushing objects, characters are completely invincible and cannot be attacked or healed with a First Aid Spray. If another character or an enemy blocks the object being pushed, the character will cease to push the object and return to their normal state. This also applies if the object can no longer be pushed.
DOORS

OPENING DOORS
Whenever your character is positioned facing a door, by pressing the Action button, your character will open it and proceed out of the room (provided the door itself isn’t locked). Depending on how you’re playing, the loading transition from the previous room to the new room will differ. Using doors is a great way to reset rooms whenever a room is too dangerous to get through normally. By using a door and resetting the room, when you return to the room, the enemy positions might change or one of the enemies might be gone. In Single Play Mode, there is no penalty for using doors to go through other areas. However, Network Play Mode, each time you use a door, 12 seconds will be added to the overall play time, easily affecting your rank and it can ruin speed runs or max point runs.
Characters coming out of doors will have 1 second of invincibility before they’ll be vulnerable to attacks again. This invincibility also eludes the character from an enemies’ field of vision despite being in it. Once the second is up and if the character is still in the enemies’ field of vision, they can aggro against them.
Stalking enemies that can attack and open doors to chase characters can be manipulated by door resetting. If they’re in a current room and you leave to another room, you can wait for them to attack the door you used then go through without them being there upon returning.
Enemies that stay in rooms permanently and do not chase characters through different rooms will always remain in the exact spot they were at upon returning to the room. You can lure these enemies to the door then leave and upon returning, take advantage of the 1 second invincibility to run past them.
After leaving a room, if you’re trying to reset a room due to too many enemies, you’ll need to wait a few seconds before reentering the room, otherwise the room will not truly reset and all the enemies will still be in the room. If you know exactly what enemies will chase you into the room you retreated to and wait for them to attack or open the door to enter the room you escaped to, you can reenter the previous room (keep in mind non-stalking enemies will still always in that room and at whatever spot they were at when you left it).
Effective room resetting requires decent knowledge of which enemies are programmed to stalk or remain fixed. Also, every enemy that does explore rooms to find characters to attack all have preset routes they take so knowing their routes allows you to avoid them as much as possible and avoid unnecessary room resetting.

LOCKED DOORS
When a character attempts to open a locked door, instead of text appearing on the bottom of the screen and freezing the game, the character will rattle the doorknob instead (characters can be still attacked while trying to open the door). The fastest way to open doors is to find the key appropriate for the door. However, there are some doors that say they have fragile locks and do not have keys to open them. Instead characters must attack the door to successfully open them. Alyssa can also open locked doors quicker by utilizing her Picking Tools and using the correct pick to unlock these doors (refer to the appropriate scenario category or CHARACTERS category for the correct picks). Keep in mind, that Alyssa cannot open every locked door that requires a specific key with the exception of the Outbreak scenario.

HOLDING DOORS
To hold a door, you must press in the direction of the door and hold the button of the D-Pad or control stick. If done correctly, your character will take a stance and will hold the door shut. Doing this grants the door more structural points and makes the door harder to force open with attacks. This is a tactical option if your teammates need to complete a task and need more time without enemies entering the room and causing problems. Holding doors will prevent your teammates from entering or leaving and they'll know a player is holding a door as a message will display saying the door is being held by something.
STATUS SCREEN
Pressing the Start button opens the Status screen which will display various bits of information allowing you to see your inventory along with any other partners in the room with you. The Status screen allows players to use items from their inventory, equip or unequip weapons, or combine items with other items in their inventory. This also allows you to request items from your partners as well. Remember that the game is still in progress as you toggle through the Status screen and you’ll return to the game immediately if you’re attacked or healed by a First Aid Spray.

ITEM
Displays the main section status screen which shows, the characters name, status, virus bubble, inventory slots, virus gauge, ECG, and a window that will display an item highlighted from the inventory and a short description of the item. Below are what is displayed on the status screen.
Character’s name
Current status
Virus bubble which indicates the level of viral contamination the character is suffering. Will change colors from blue to green to yellow to red once that characters have reached a certain percentage. Unless using an Emulator Tracker (except when playing online) to know the exact virus rate of your partners, this is the only way to know the virus status of your partners.
Inventory slots. Characters can hold up to 4 items and if an item occupies that slot, it’ll display in that slot.
Special item unique to the character being. Players can access these items just like in the default inventory.
Electrocardiogram (ECG) that displays the character’s heartbeat. The ECG will change color to match the character’s current status as well as display the level of status the character is in.
Virus Gauge: Shows the character’s current level of viral contamination. At certain percentages, the virus gauge will change color and display more T-virus cells.
Displays the item along with its name, remaining ammo (if it is a firearm), and a short description of that item currently displayed from inventory.
SPECIAL: Displays Special Items obtained throughout the scenario. Pressing the Action button will give a short description of the item. Characters can only procure 8 Special Items per play through.
FILE: Select this to view any files that have been collected throughout the scenario. Select a file you wish to view again and press the Action button to open up the file to read.
MAP
Maps are obtained by examining sparkles in the room the map is located at. Once you’ve collected the map, the area in which it covers will display fully when you open up the Map menu (keep in mind the button to open the map is based on the version you’re playing). The map will display the entire area and will highlight which areas you’ve already visited and which room you’re currently in. Keep in mind, that when you don’t have a map, only rooms you’ve accessed at least once will display on the menu. You can use the left control stick or D-Pad to move the map around and press the R1, L1, R2, or L2 buttons to switch maps. The right control stick will allow you to zoom in and out of the map. By pressing and holding the button to open the map, you can move around with the map displayed. The map will close, once you release the button, Ad-Lib, pause, or are attacked by an enemy.
Maps are important to finding the whereabouts of other characters as this will indicate the location of characters speaking, calling for help, characters currently dying, characters that have died, or have zombified. Any items that have been examined will display a letter icon associated to that item on the map.

MAP ICONS
ARROW CURSOR
Indicates the player's position and which way they're facing.
GREEN DIAMOND
Displays your partner’s current location whenever they are using Ad-Libs or commands. This only works in Network Play Mode.
YELLOW DIAMOND
Displays your partner’s current location whenever they’re currently in Dying status.
RED X
Displays your partner’s current location of where they died. In Network Play Mode, a moving Red X indicates that they’re currently a zombie.
W (WEAPONS)
Displays the position of weapons.
A (AMMO)
Displays the position of ammunition.
R (RECOVERY)
Displays the position of recovery items.
O (OTHERS)
Displays the position of miscellaneous items, such as key items for example.
?
Items that have not been examined in a room will have a “?” on it. This only displays when using Jim due to his Item Sense ability.
YELLOW DOOR
Door has not been checked yet.
RED DOOR
Door is currently locked.
BLUE DOOR
Door is currently unlocked.
ITEMS

OBTAINING ITEMS
As you explore the environment, there will be items that are scattered throughout the room or corridors. These items will normally sparkle, indicating that you can pick these items up. However, some items don’t glitter but can be picked up by examining them and some items are well hidden making them hard to find naturally. To successfully pick an item, you must approach it and press the Action button. Your character will enter an item pickup animation then the Status screen will open asking if you wish to take the item. It is important to note that during item pickup animations, you’ll have invincibility for a short amount of time which can be exploited to dodge enemy attacks.
When picking up an item, if there is an empty inventory slot, the item will immediately take up that empty slot if you decide to take the item. However, if you wish to replace a current item in your inventory, select another slot. Your character will then replace the item previously in your inventory with the one you just picked up. The item replaced will then be positioned exactly or close to where the original item was. It is important to note that removing item spots in a room can make item toggling difficult and harder to set items down for later when preparing for an upcoming boss battle. Therefore, it is suggested if you need to grab an item but don’t want to permanently remove that item spot, is to place useless items in their place so you can eventually replace that item with something better. This is something you become accustomed to, especially in Network Play Mode.
When picking up items, some items can be combined together such as herbs, medicines, and ammunition. If you pick up more ammunition or herbs, you can then select the same item or a different herb in your inventory. The game will ask if you wish to combine the herbs if you highlight an herb in your inventory. However, as previously mentioned, if you wish to not remove item slots, you can put the same type of ammunition in another slot and not combine with your current ammo.
Only one item can be picked up at a time even if multiple items currently occupy the same spot. Often times, you’ll need to pick up at least one of the items in order to grab the other. All characters except Yoko can only hold 4 items at a time. When picking up items as Yoko, you can highlight her Knapsack in the Status screen to move the items picked up into her Knapsack without taking up her default inventory slots. While playing as Cindy, if you pick up herbs, she can store them inside her Herb Case as long as she hasn’t reached the max capacity of herbs she can store.

USING ITEMS
To use items in your inventory, you must open the Status Screen and select the desired item to use. Press the Action button on the selected item for pop-up options to appear and choose the Use command. Your character will use the item, provided the game will allow you to do so. Key Items such as Keys for example, require your character to be properly positioned close to the door to use successfully.

EQUIPPING ITEMS
If a character has a weapon in their inventory, they can use the Status Screen to equip and unequip weapons. Select the weapons from the Status Screen, then press the Action button to open more pop-up options and select the Equip command. Your character will then equip the selected weapon with the word “Equip” above the weapon. Your character can also equip weapons if you select the Reload command and then select the appropriate weapon. First Aid Sprays can also be equipped and use to heal other characters.

COMBINING ITEMS
Items in your inventory can be combined to create newer items or to increase the quantity of that item - such as with medicines and ammunition. Some items can be combined with George’s Medicine Set, David’s Tool Box, Yoko’s Knapsack, or Cindy’s Herb Case. To successfully combine items, open the Status Screen and select the highlighted item from the inventory and press the Action button to display popup options, then select the Combine command and select another item in the inventory you wish to combine. If the items can be combined, it’ll create a new type of item or if you wish to combine the same type of ammunition with what you already have to free up inventory space.
Some items such as Homemade weapons require David to have Vinyl Tape in his Tool Box in order to create. Also, ammunition has a limit to how much can be held before it takes up another inventory slot.

REQUESTING ITEMS
Players can request items from AIPC partners or other players when they’re in the same room. By opening up the Status Screen and checking their inventory, you can see what items they currently have and request an item that you desire from them. If you need an item from one of your partners, move the cursor to their inventory and press the Action button to display the Request command and press the Action button again for your character to make a request of the desired item to that character. In Single Play Mode, your AIPC Partners will immediately stop what they’re doing and approach you to hand over whatever item you request (provided they’re not attacked while trying to come to you or other factors). Keep in mind during Network Play Mode, you’re playing with real people and they might not oblige to your item requests.

PRESENTING ITEMS
If an item is being requested by another player or you wish to just offer up an item, there are two methods in presenting items to other characters. The first way is by opening the Status Screen and selecting the highlighted item and pressing the Action button and then selecting the Present command from the list of popup options. Your character will enter an item presenting animation that will last until you hit the Cancel button or your partner takes the item from you.
The other method is faster and safer, open the Status Screen and highlight the item you wish to present from the inventory and press the Square button. This’ll take you off the Status Screen and back to the game while your character is in the item presenting animation. Like in the Status Screen, you can press the Cancel button to cancel the item presenting animation. When presenting items to AIPC partners in Single Play Mode, if you do not call out the character by name while presenting an item, the closest AIPC partner will go for the item. In Network Play Mode, you’ll need to be specific when presenting items so that the right player receives the right item you’re trying to offer.
RIGHT TIME TO TRADE ITEMS
In Single Play Mode, you have a better chance of offering or requesting items when there's not an enemy around to interfere in the item transaction. AIPC partners will no longer attempt to hand out requested items nor try to take items you present to them if they’re attacked or there are too many enemies present as they’ll just revert back to their normal behavior instead. If you must offer up an item to an AIPC partner in enemy-filled rooms, it is best to approach them and quickly offer up the item by pressing the Square button after you’ve highlighted the item in the Status Screen. This can also apply in Network Play Mode.
However, if you must hand out an item due to an item request or to help another player out and presenting the item isn’t a safe option, you can set down the item by replacing it with newer item and pointing at the item for the other player to grab. You’ll need to use full judgment when trying to offer items so that you and your partners don’t risk being overwhelmed by enemies and possibly dying.

TAKING ITEMS FROM DEAD CHARACTERS
Anytime you’re in a room where one or more of your partners has died, you can use the Status Screen to take or replace items from your inventory on their bodies. A dead character’s inventory acts as a storage unit allowing you to store items you may need for later without having to carry them or toggling item spots in the room. Despite 8 inventory slots opening up, you can only access the slots that have items, so it is best to not remove items from a slot without replacing it with something else unless it is a part of the game where you won’t ever come back to that particular section of the scenario. If Yoko had a full inventory and has died, you can take advantage of the extra four slots in her inventory but remember they’ll be inaccessible if you remove an item permanent from that slot.
CHAT SYSTEM

CHAT COMMANDS
Chat command gives you and your partners a limited way of communicating with each other in game. The right control stick is used to give certain commands which can program AIPC partners to perform certain actions or telling other players what to do. Pressing the R3 button will cause the character to say the Wait command and pressing and holding the L2 button while pressing R3 will cause the character to say the No command. By pressing and holding the L2 button and moving the right control stick either left, up, or right, this allows you to call out specific characters by name and also allows you to give them commands.
The Square button allows all characters to use Ad-Libs which cause them to say audio words in addition to a small sentence of text on the bottom portion of the screen. Ad-Libs can be used in a serious or comical fashion but they sometimes can be used to reveal hints or clues as to what to do in the scenario (though this isn’t completely reliable). Ad-Libs are also great in knowing if a room you’re entering or a further section of the area has enemies as there are fixed Ad-Libs the characters will say when enemies are present.
Chat commands can be used to program AIPCs to perform certain actions. Bear in mind that not every character that is an AIPC partner will oblige and obey your commands as they can reply negatively and not assist or follow you when you need them to. If you need a specific AIPC partner to do something, you’ll need to address them by name first, then issue the command, otherwise the closest AIPC partner will react towards your commands. AIPC partners can also issue commands to the player and just like with the AIPC partners being issued commands, you do not have to comply with their commands. Normally the AIPC character’s behavior will change based on scenario progress, their current status, or your current status, so if you want your partners to stay with you more often, sometimes it isn’t a bad idea to stay lower in status, as improving your status will change their behavior and cause them to run off on their own.

AIPC BEHAVIOR
In Single Play Mode, AIPC partners are controlled by artificial intelligence and will act according to various situations that are currently present. Like you, they can talk, move, attack, run, walk, and hold and use items. However, they can also take damage and die. AIPC partners that die will remain in the room they died and will no longer interact for the remainder of the scenario. Also, AIPC partners that die during the scenario cause the player to take a penalty in terms of Result Points receiving less upon completing the scenario. On Easier difficulties, keeping AIPC partners alive is less difficult due to the large quantity of recovery items and ammunition but it becomes much more difficult on harder difficulties and oftentimes, not worth the hassle in keeping them alive. In specific scenarios, your AIPC partners will intentionally split up with you to explore a certain area you decide not to explore and will normally retrieve key items tied to that area they explore alone, significantly reducing the time to complete the scenario.
However, AIPC partners will not always naturally stay with the player in every room they’re in and will explore on their own. AIPC partners will then suffer vitality point decay that increases on higher difficulties and the more they transition from different rooms. The decay can cause them to enter Dying status in any room (even rooms that never have enemies or all the enemies in that room have permanently been cleared out). Once an AIPC partner dies, they’re out of the game until the scenario is completed. If an AIPC partner dies and had items, you’re able to take items from their corpses or replace items in your inventory with items in their inventory. Generally, they create possible 4 extra item slots in the room they died in which can allow for extra item storage and saving up items for later and also prevents another AIPC partner from grabbing items you intentionally sit down for later.
While off screen in addition to suffering vitality point decay, if AIPC partners get a hold of weapons, they will also be used. Melee weapons will lose structural points and bend or break, and they’ll deplete the ammunition from firearms until their weapon is used up so you’ll need to be careful in handing out weapons if they’re not going to stay in the room with you, as they can quickly drain away your resources. If an AIPC partner is nearby in another room, their Ad-Libs can still be heard.
While AIPC partners are naturally staying in rooms you’re in, they will often explore on their own or will follow you closely depending on the situation. Having AIPC partners in the room with you can sometimes attract the enemies’ aggro onto them and you'll be ignored completely. Oftentimes, AIPCs will attack enemies even when not given commands naturally on their own. This has upsides and downsides, as they can waste your resources, but at the same time give you opportunity to explore or solve puzzles while the AIPC partner distracts the enemy. Keep in mind that they may sometimes attempt to run past an enemy without attacking it and take damage as a result even if they’re properly armed.
Each character under the control of the AI will act accordingly based on their personalities. So they might not be entirely cooperative and it is never a good idea to completely rely on AIPC partners to properly bail you out in tough situations. Even without commands given, their behavior will change depending on their current condition or your condition, so some characters will stay with you as long as your status is bad or if their status is bad but will leave you to explore on their own if your condition improves or their condition improves. Cindy in particular will heal a player two times a scenario if they hit Danger status then no more but if they are in bad shape and she no longer can heal that player, she stays with the player until their status improves.

SPECIAL COMMANDS
When these commands are used for AIPC partners, they’ll perform these actions more intentionally provided if they comply with the command and do not object:
GO: The AIPC Partner will move on ahead and will oftentimes leave to explore on their own. If a certain character that normally stays with the character is given this command and they comply, they’ll explore on their own for a little while then eventually come back and follow the player around. This command is good in getting the AIPC partner to leave a dangerous room quickly.
HELP: The AIPC partner will stop what they’re doing and will follow the player closely. They’ll also attack enemies more often. If an AIPC partner is close by in another room and they respond favorably to the command, they’ll enter the room you’re currently in and stay with you for a bit. After a while regardless if the character follows you naturally or not, they’ll go off on their own to explore. This command is a decent substitute of the AIPC partner doesn’t not respond favorably to the Come command.
COME: The AIPC partner will follow the player closely temporarily and will oftentimes attack enemies more often. Use this command if you need them to follow you for certain areas. If the AIPC partner is in another room but close by, they’ll enter the room you’re currently in and follow you. After a while, they’ll go off to explore on their own again. If an AIPC partner does not oblige to this command, use the Help command instead.
THANKS: Does nothing. The AIPC’s behavior isn’t changed.
WAIT: The AIPC partner will wait on the spot they’re at and will not leave the room or follow you. Useful if you don’t want them following you around but this command is only temporary and after a while, they’ll move on their own to explore or enter the room you’re in to follow you around or be nearby. Using this command can potentially cause vitality point decay and resources lost as the character begins to transition to different rooms. Not a reliable command for AIPC partners.
NO: Similar to the Thanks command, this command does not change the AIPCs behavior or actions.
T-VIRUS INFECTION
All characters will start every scenario infected with the T-Virus that gradually spreads in the character’s body as time progresses. The Virus Gauge that always appears in the Status Screen acts as a timer, giving players a set amount of time to complete the scenario before too much time elapses and the character becomes fully infected and then dies. As more time progresses, the virus gauge will displace on the game screen warning you at its progress. Time a character has to complete the scenario can be reduced by being attacked by enemies, as they’ll spike a character’s virus by leaps and bounds depending on the enemy. When characters are attacked, the virus gauge will always appear on screen. Some characters have better resistance to the growth of the virus than others, so some characters can live longer than others while some characters will not receive as much viral contamination when attacked by an enemy compared to others (refer to Recovery Items for more details).
The T-Virus growth can be temporarily halted by using any recovery items but recovery items such as the Anti-Virus Pill and Anti-Virus Pill (L) will halt the virus’s growth longer than regular recovery items. Anti-Virus Pills can be found in some scenarios but George is capable of making these medicines by combining the correct mixed herb compounds in his inventory with his Medicine Set. Even if you manage to stall out your virus for a very long time, you have 5 hours to complete the scenario before you automatically lose the game, regardless if it is Single Play Mode or Network Play Mode.
If a character takes too much damage and falls to the ground, their virus will increase rapidly until either the character uses a recovery item to pick themselves off the ground or a partner still able to stand, picks you up off the ground. Keep in mind in Single Play Mode, if you’re playing in Lone Wolf Mode, the game is be over if you enter Dying status and do not have a recovery item to pick yourself up off the floor. When a character’s virus gauge hits 100%, the character will die or return to life as a zombie. In Single Play Mode, players and AIPC partners will immediately die once their virus reached full viral infection while in Network Play Mode, players will zombify and can attack other players.

PAUSING THE GAME
By pressing the Select button during the game, the game will pause, stopping the in-game timer, and opens up a menu where you can quickly change the control types, adjust the in-game audio, adjust the game brightness, or quit the scenario. Any adjustments you make in this menu won’t save until after you’ve either completed or quit the scenario and select the option to save when prompted (unless you enabled auto-save from Options). Unfortunately, during Network Play Mode, the game will continue like normal so if you must access the menu, be sure you’re in a safe place as you’ll immediately revert back to the game if you’re attacked or sprayed.

CARRYING WOUNDED CHARACTERS
Characters that have been severely wounded or are currently under the Bleed status will be unable to move normally and will become easy targets for enemies. Characters that are in better shape and can move normally can approach limping characters and shoulder them. Shouldering an injured character is faster than them limping on their own. To shoulder an injured character, approach them and press the Action button. Your character will then grab the injured, and shoulder them. During the animation of grabbing an injured character, both characters will have invincibility until the healthy character fully grips the injured one. You can release the injured character by pressing the Cancel button.
In Single Play Mode, NPCs and AIPC partners will remain shouldered until the player releases them or either character is attacked. In Network Play Mode, players being shouldered by another player can force the healthy player to release them if they press the Cancel button anytime they’re being shouldered.
COMBAT

UNARMED ATTACKED
When characters are not equipped with any weapons and enter the aiming stance with the R1 or L1 buttons and then pressing the Action button, characters can perform either a Tackle or Foot Stomp (if aiming downward). Unarmed attacks are the weakest attacks in the game and do not inflict a lot of damage against enemies, making them near useless for actual combat. However, they can stun enemies which can provide enough time to rush pass the enemy. This is most effective against zombies as the stuns they undertake will give character enough time to run by during their recovery animation. Tougher enemies will only be grazed by the tackles and stronger enemies won’t be stunned at all from them.
Foot Stomps are more powerful than Tackles but they have very limited range and will cause light stun on most enemies when hit. However, they can be used to finish off zombies that have fainted, Leeches, or Baby Moths. They help to conserve ammunition but are dangerous to use against some enemies like Hunters, Lickers, and Zombie Dogs. There is also a technique where you can foot stomp lock zombies to death and prevent them from counter attacking which is a great way in disposing single zombies without using up any ammunition. This requires practice and timing to do effectively without any retaliation. Tackles performed on zombies is an easy and reliable way to set up for foot stomp locks against zombies.

MELEE WEAPONS
Melee weapons are ordinary items that can be equipped and used as weapons. Unlike unarmed attacks and firearms, melee weapons have longer wind up, are riskier to use, and degrade the more they’re used. Melee weapons have a hidden value of structural points that decrease whenever they successfully strike an enemy, door, or boundary such as a wall for example. There is no way to know exactly how many structural points the melee weapon will have (unless you’re playing on Emulator and are using an updated Tracker that displays the structural points) and once the structural points have reached 0, the weapon will bend or break, becoming a new weapon. These weapons are slightly more plentiful than firearms but they are dangerous to use, as they require enemies to get dangerously close to use effectively, especially if you’re attacking enemies from the front.
Melee weapons come in two types of utility: Swing and Poking melee weapons. Swing-Type melee weapons have short range, but are tougher to use than poking-based melee weapons and characters swing the weapons horizontally which can lead to accidentally hitting walls and barriers. Poking-based melee weapons have much more range than swing-type melee weapons but have longer start up and recovery but are much safer to use in tighter corridors compared to swing-type melee weapons. When playing in Infinity Mode, melee weapons have infinite structural points and do not bend or break.
Knives can be found in a scenario to combat enemies. Unlike normal melee weapons, knives don’t have structural points and can be used infinitely. Their range is shorter than standard melee weapons and don’t stun enemies for very long when they do hit, making them just as dangerous to use up close. Characters swing knives similar to swing-type melee weapons, so they can be very dangerous to use in tight passages and corridors. With proper timing and practice, many enemies can be knife-locked effectively without retaliation.

THROW WEAPONS
Throw weapons are a bit rarer to come across compared to other weapons in the game. These weapons are classified as “projectile-based” or “Other” when used and successfully strike enemies. Throw Weapons must be re-equipped each time they’re used (such as Molotov Cocktails and Chemical Bottles). However, weapons such as Sticks, Broken Crutches, and Bent Iron Pipes are one-time throw weapons and then the character’s inventory will be empty afterwards. These weapons travel in an arc that has limited range. This also makes them tougher to use effectively as the weapon will travel straight and can overshot enemies depending on how you were aiming when the weapon was thrown. Spacing is essential for effectively using throw weapons.

FIREARMS
Firearms are the most effective way in fighting enemies as they allow you to maintain distance while inflicting damage. Firearms require the appropriate ammunition to operate and become useless once all the ammunition for that weapon has been used up and there is no more available ammo left for that firearm. Firearms attack power however diminishes in the further you’re away from an enemy, so it will require more ammunition to take down an enemy from a distance compared to fighting them up close. Depending on the firearm used, you can perform effective stun lock strategies against certain enemies and some enemies will receive extra damage when hit by a specific weapon at a certain range. Characters can reload their weapons by pressing L2 (provided they have the applicable ammunition for that firearm).
Most weapons will cause characters to still maintain their default movement speed, but 2-handed weapons such as the Shotgun, Submachine Gun, and Assault Rifle will cause some characters to run faster than they would (except for Kevin, these weapons will cause him to run slower). If characters are equipped with Handguns or Magnums are grabbed by specific enemies, they can perform a newly introduced defensive escape known as the “Emergency Escape” to free themselves from the enemies’ grip and inflict heavy damage to them as well (refer to the Weapons category for more details).

AIMING
By pressing and holding the R1 button, your character will auto-aim at the closest enemy. Pressing and holding the R2 button will cause your character to manually aim depending on the direction they’re facing. Auto-aim is the easiest way to attack enemies. In Network Play Mode, auto-aiming can sometimes trick players into attacking enemies that aren’t truly there for the Room Master’s screen due to lag, therefore, manually aiming is much more preferred as once you get an idea of how the enemy works in lag, you can manually aim and attack and have more success hitting the enemy.
If you need to switch targets because one enemy is closing in, by pressing the L1 button while holding the R1 button will allow you to switch to the next-closest target available. Beware, as this can backfire if you’re facing fast and mobile targets such as Zombie Dogs, Crows, and Giant Wasps.
GRABS
Enemies with the ability to grab characters will be able to inflict larger amounts of damage with their attacks the longer they have the character in their grips. Due to the Bleed status effect and viral contamination that can quickly accumulate during grabbing struggles, it is essential to escape from grabbing attacks as soon as possible. Unlike the more modern Resident Evil titles, there is no Quick Time Event (QTE) that displays when a character is grabbed, so the character must quickly mash the D-Pad or left Control Stick along with the Cancel button in order to break free as soon as possible.

STANDARD ESCAPES
The default escape whenever: a character is not equipped with a handgun or magnum, decides not to perform an Emergency Escape when they’re equipped, or the Emergency Escape does not work against a specific type of grab. Players must quickly mash the D-Pad or left control stick along with the Cancel button to break free. Standard Escapes do not prevent grabs from causing damage, viral contamination, and potentially Bleed status.

EMERGENCY ESCAPES
If a character is grabbed while having a Handgun or Magnum equipped, depending on the type of grab the character received, an Emergency Escape can be performed to quickly break free from the grab, potentially avoiding damage, viral contamination, Bleed Status and also inflict a large amount of damage against the enemy. To perform an Emergency Escape, you must hold the R1 or R2 then mash the D-Pad or left control stick along with the Cancel button in which your character will take a defensive stance and will shoot the enemy in the head to force them to release the grabbed character. Emergency Escapes have the potential of killing the enemy that has grabbed you. Keep in mind that this requires the Handgun or Magnum to be loaded to perform the escape. Lastly, the Nail Gun, which is available only on the Outbreak scenario can also be used to perform Emergency Escapes.

LEDGE JUMPING
During the Outbreak scenario, there is a ledge you must jump to react the other building. As soon as you react the ledge, press the Action button. Your character will begin to backup a few steps then will go forward and attempt to make the jump. Press the Action button just as soon as they’re about to jump. If you press too early, your character will miss the jump and will hang from the ledge. Repeatedly press the Action button you climb yourself up the ledge. If another character has already made it over, they can assist characters that missed the jump by approaching the hanging character and press the Action button. Beware, as if enemies are present, they can attack characters hanging from the ledge and will fall to their death if they successfully attack the character.

TYPEWRITERS
During Single Play Mode, Typewriters will appear in various rooms for players to save their progress. Unlike the previous Resident Evil titles, an Ink Ribbon is not required to use a Typewriter. Approach the Typewriter and a menu will appear asking if you wish to save your progress. If you decide to save, the game will immediately take you back to the main menu once the game's progress has been saved. When you wish to continue, select Scenario from the main menu and it'll ask if you wish to continue. If you decide to continue or not, the file will be overwritten.
There are no penalties for using a Typewriter so if you can save as much as you want. In Network Play Mode, Typewriters are only available in the East Area.